Switchvox: Connect A SIP Trunk

Written by Jack Wagner
Updated at March 13th, 2024
Table of Contents
Scope
Intended Audience: Support Technicians and White Label Partners
This article outlines how to configure a SIP trunk between your hosted PBX and a Switchvox instance.
Requirements
- Access to the Switchvox PBX admin panel
- SIP trunk information (Create a SIP Trunk); Use IP-based authentication with the static IP address for the Switchvox PBX
Connect A SIP Trunk
- Log into the Switchvox admin panel.
- Navigate to Setup > VOIP providers
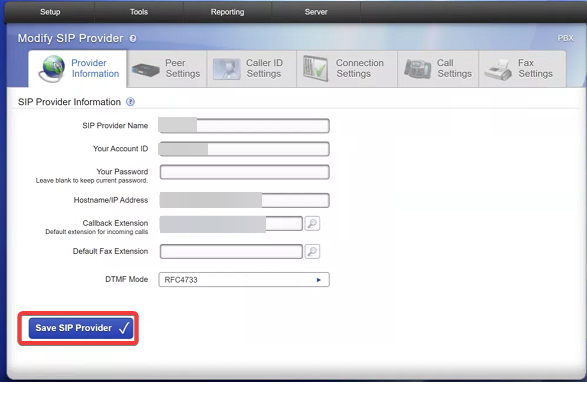
- Click Create SIP Provider:
- Provider Name: <Provider's Name>
- Account ID: <Caller ID Number>
- Hostname: <Domain Name>
- Click Save SIP Provider
- Locate the SIP provider you just created and click the pencil icon
- Navigate to Caller ID Settings and configure the following:
- Caller ID Name: <Number associated with the SIP trunk>
- Caller ID Name: <Number associated with the SIP trunk>
- Navigate to Connection Settings and configure the following:
- SIP Port: 5060
- SIP Expiry (In seconds): 120
- Proxy Host: sbc.ucaasnetwork.com
- Authentication User: <Number associated with the SIP trunk>
- Always Trust This Provider: Yes
- Qualify Hosts: No
- Include user phone in SIP: Yes
- Use Local Address In From Header: No
-
SIP Transport: UDP
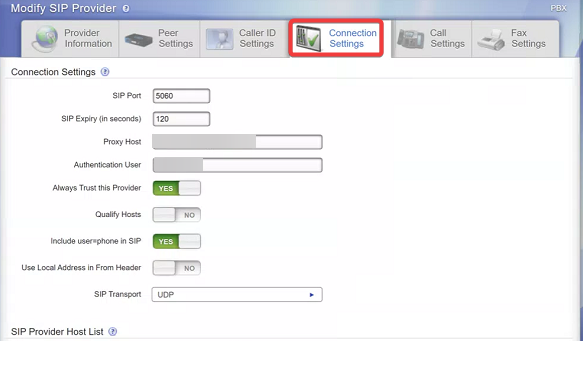
- Click Save SIP Provider
- Navigate to Setup > Incoming Calls
- Click Single DID Route
- Configure the following values. All other settings can be left empty:
- Rule Name: <Name for the rule>
- Incoming Provider: <Provider name configured in step 3a>
- Incoming Call Type: Voice Calls
-
Extension to Route Call: <Extension you'd like calls to go to>
- Click Save Single DID Route