Add PBX to TeamMate Connector Enterprise
Table of Contents
Scope
Intended Audience: White Label Partners, Netsapiens Providers, & members of Client Success
This article outlines how to add a PBX to a TeamMate Connector enterprise. The PBX is used to register users to the phone system. This step may only be completed after the client has finished their direct routing process.
Requirements
- Access to TeamMate Reseller Portal
- Client ID & Secret (White Label Partners should contact Client Success if they need this resent)
- TeamMate Connector PBX Credentials (White Label Partners should contact Client Success if they need this resent)
Configure PBX Settings
- Log in to the TeamMate Reseller Portal and navigate to the enterprise you'd like to configure the PBX for
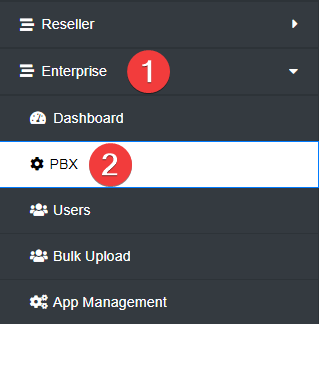
- In the left-hand sidebar, click Enterprise > PBX

- Complete the following fields, leaving all others default:
- PBX Type: Netsapiens
- PBX Location: Enter a name for this. Usually PBX
- PBX DNS Lookup Type: SRV
- PBX SIP Domain: Enter the full PBX domain of the client (it can only be alphanumeric)
- PBX SIP Domain Proxy: Enter the outbound proxy of the PBX. Usually sbc.ucaasnetwork.com
-
Voicemail Feature Code: 9901
NOTE: This may vary for Netsapiens providers
- Click Save Settings

Configure Advanced Settings
- Select the ellipses menu next to the PBX you wish to configure and click Edit

- Click Advanced Settings
- Complete the following fields:
(Information found in Library)- Portal Authorization URL:https://<Portal FQDN>/ns-api/oauth2/token/
- Client ID: Enter the Client ID for the PBX
- Client Secret: Enter the Client Secret for the PBX
- API Access Username: Enter the login name for the TeamMate Connector PBX user
- API Access Password:Enter the password for the TeamMate Connector PBX user
- Autofill SSO settings from Endpoint and Access token credentials?: Yes
- Click Save Settings

- Once the PBX settings have been completed, you may advise the client to enable calling. Partners may also configure Single Sign-On and Manage Feature Codes, but these are optional only used for the Teams End User Portal